Posts in Recipe
Turkish Eggs [Çilbir]

I’ve been thinking a lot about family history lately, where it all began and how I came about being on this earth. Brace yourself, I'm about to go deep. 

On my mother’s side it’s relatively straight-forward; our ancestors travelled from England to North America on the Mayflower, my grandpa was in the Navy, they settled in North Toronto. Thanks to a cousin taking an interest in our ancestry I’ve also discovered a bit more. For instance I have Dutch blood (in addition to the English, Irish, Scottish, French, German etc.) and it turns out I am a very distant relative to Clement Clarke Moore (that guy who wrote Twas The Night Before Christmas). I also know having looked through old photographs, that the family genes are remarkably strong – my younger brother is a clone of our grandpa, I resemble many of the women in our family, and my older brother has the family forehead, or so I’m told.

Despite being far closer to my dad’s side of the family, I can’t say I know as much about them. Knowing them (grandparents, cousins, uncles, aunts) isn’t the problem, it’s our broken history that is. Like all Armenians my family originate from Turkey, and when it became clear that they would have to leave or face ‘deportation’, they conceded and with that left and lost everything they had. My great-grandpa wrote a book about his experience of the genocide, in it listing the names of our family who perished; tragically only a handful made it to Ethiopia.

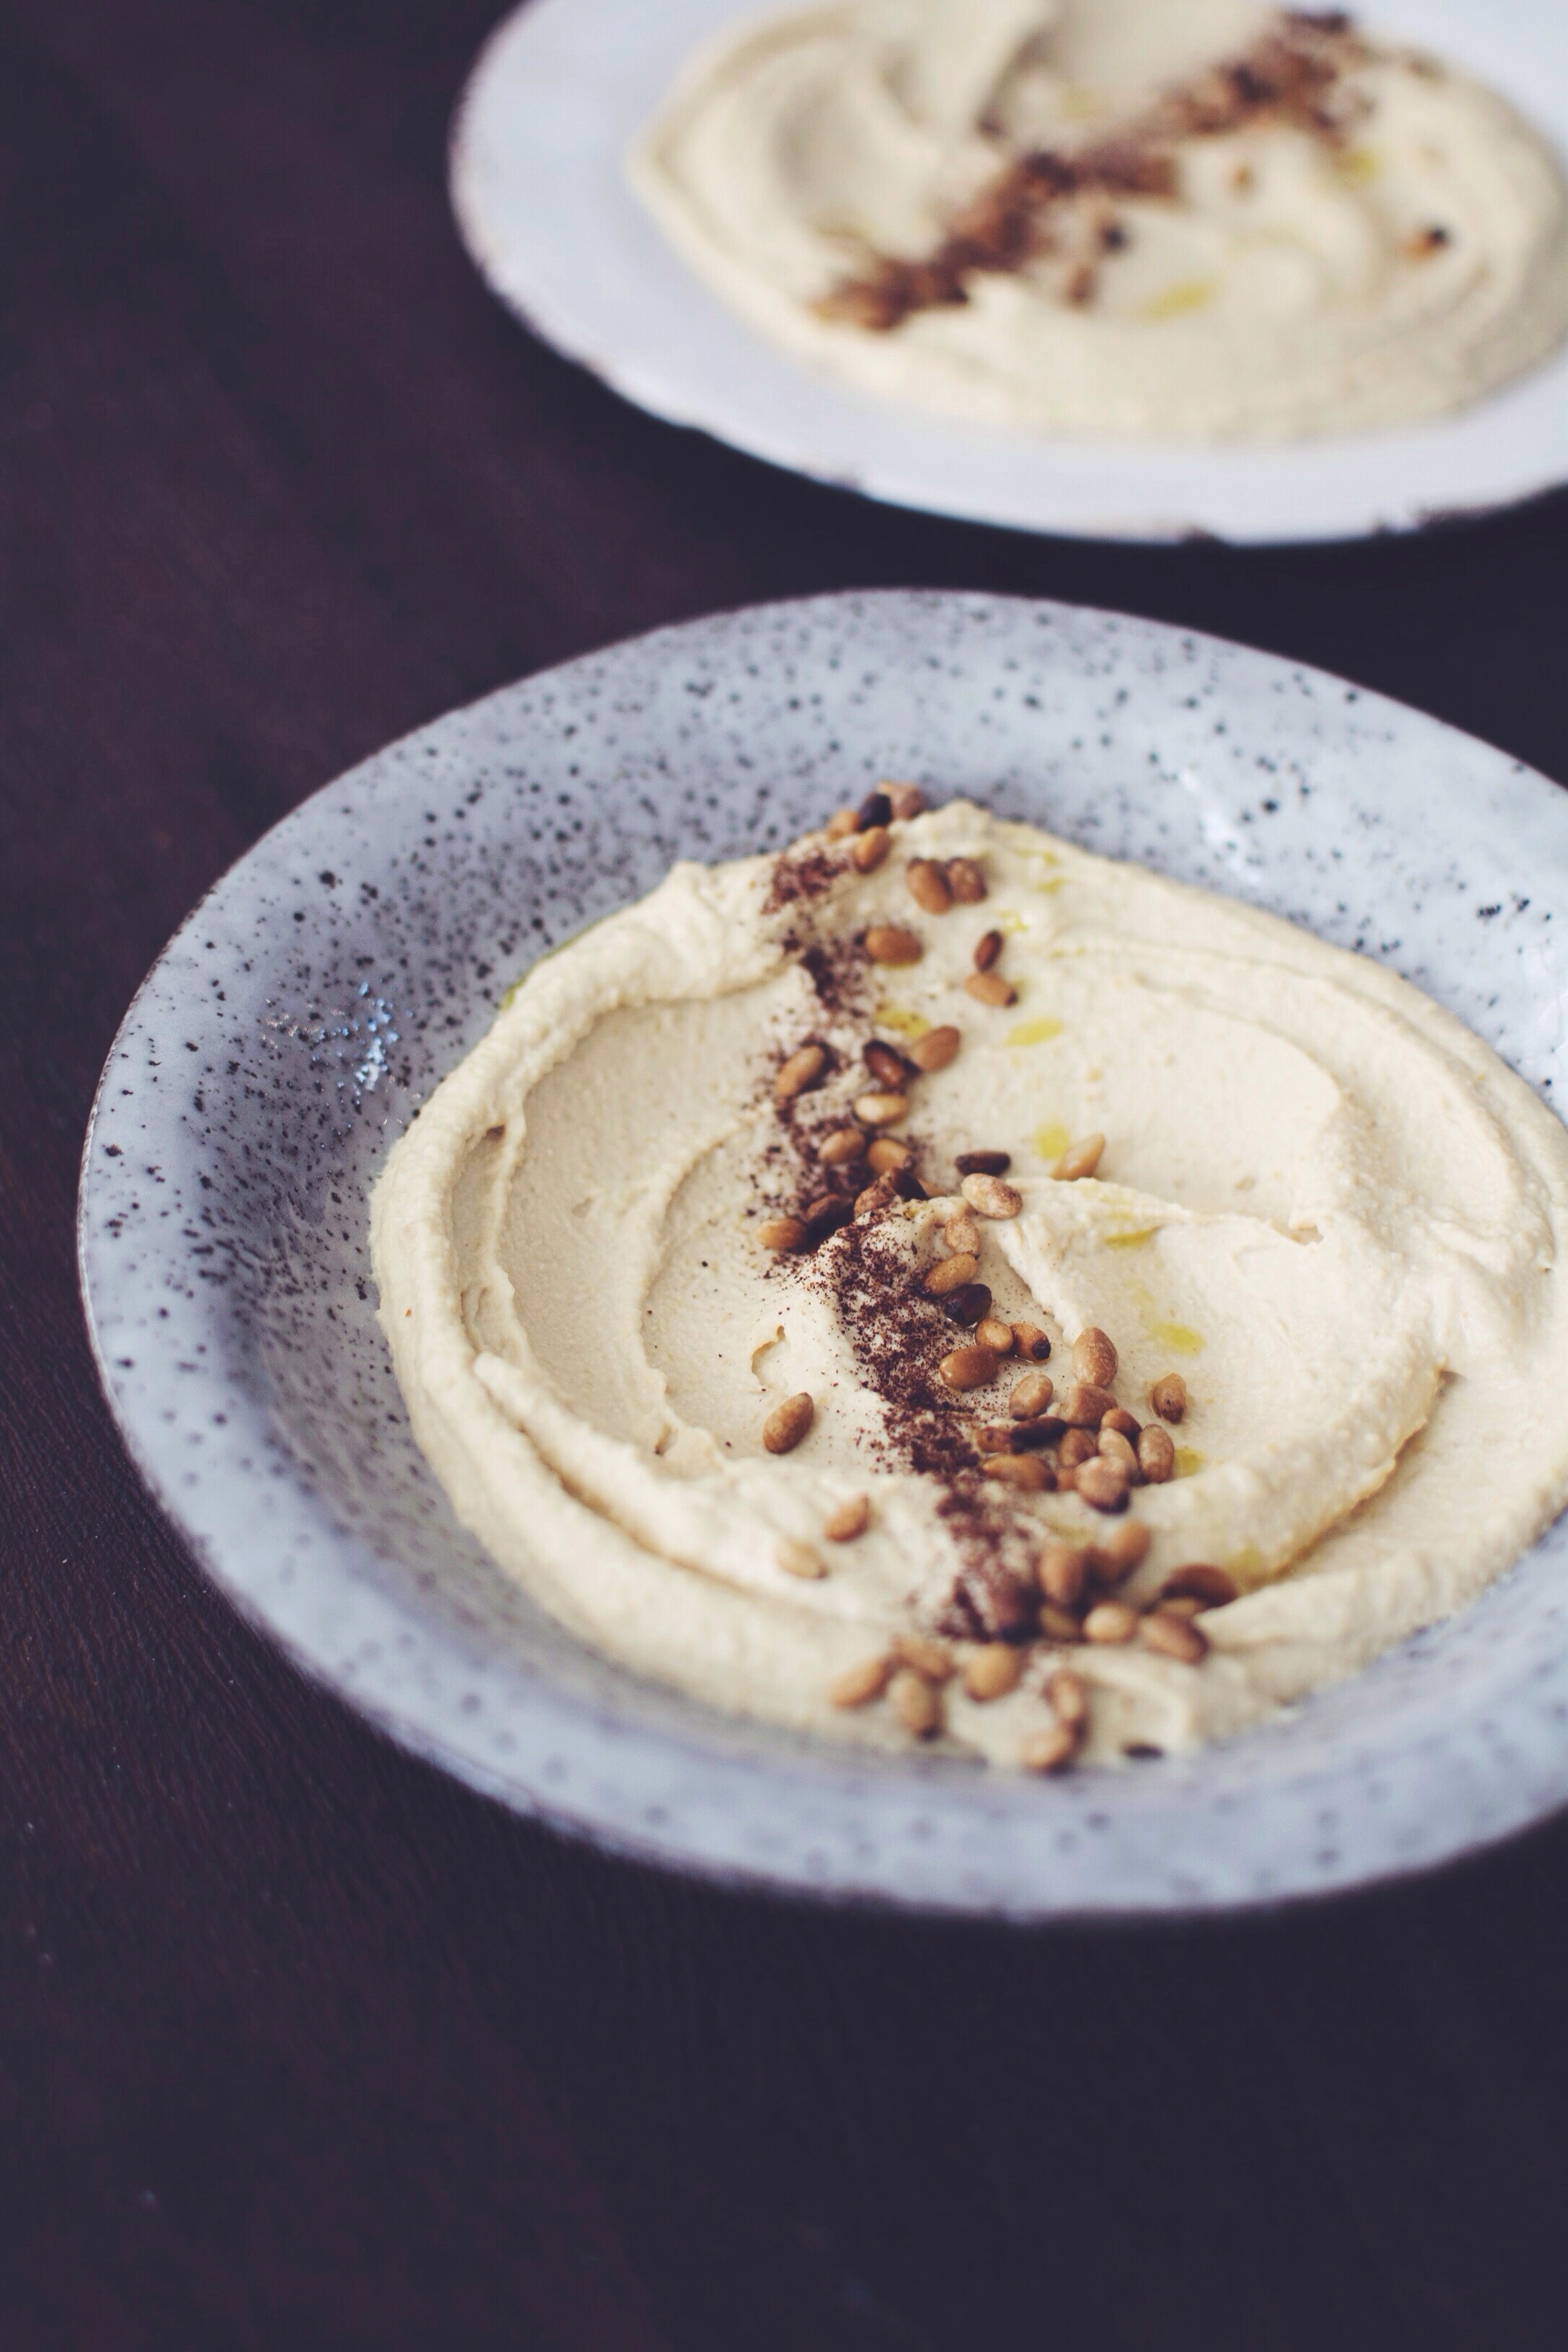
I know that from Ethiopia they moved to Cyprus where my dad was born, and as such where a lot of my inherited culture comes from (my father is a Cypriot of Armenian descent, as he likes to say). But what I’d like to know is what it had been like back in Turkey before they were forced to leave and start again. I want to know where they lived, how they’d drink their coffee and what music they’d listen to. Did they eat Armenian food or was there more Turkish influence? Did they stuff lahmajun with salad or roll it with lemon juice? Did they eat Çilbir for breakfast?

It’s just one of those things that I’ll probably never know. Either way, I’m going to continue enjoying these Turkish eggs for breakfast and imagine that my family once did too.

Turkish Eggs [Çilbir] | Thyme & Honey

Turkish Eggs [Çilbir]

Serves 2

Ingredients

2 or 4 eggs, depending on how many you’d like

250g Greek or thick strained yoghurt

30g unsalted butter

2 teaspoons smoked paprika

Sumac

2 wholemeal pittas, toasted


Method

  1. Divide the yoghurt between two bowls.
  2. Melt the butter on a medium heat until it starts to sizzle. Take it off the heat and whisk in the paprika. Set aside.
  3. Poach the eggs in simmering water. Add a splash of white wine vinegar to boiling water, reduce to a simmer and slip the eggs in one at a time. Poach for 3-4 minutes for a runny yolk.
  4. Remove the poached eggs using a slotted spoon and place on top of the yoghurt. Add a dash of sumac and drizzle with the chilli butter.
  5. Serve with toasted pitta.
Hummus

Hummus is something I can’t remember trying for the first time because I’ve never known life without it, and I don’t think there will ever be a day where I’d turn down a dip into its creamy chickpea waters. Aside from one brand available in supermarkets, the tubbed variety is really just… not hummus. Real hummus, in all its homemade glory, is fresh and nutty, spiked with lemon and a touch of garlic and should be somewhat airy and delectably smooth. Best served at room temperature, drizzled in good quality olive oil and a dash of sumac. Sharing with friends, optional.


Hummus

Makes 500g

Recipe adapted from Ottolenghi/Samimi’s Basic Hummus recipe in their gorgeous cookbook, Jerusalem


Ingredients

250g dry chickpeas (equates to roughly 500g when cooked and skins removed)

1 teaspoon bicarbonate of soda

1.5 litres water

3 garlic cloves

170g light tahini

Juice of 1 lemon

1 1/2 teaspoons salt

Sumac, olive oil, toasted pine nuts* (to serve)


Method

  1. Soak the dry chickpeas overnight in double the amount of water.

  2. The next day drain the chickpeas and cook in a saucepan on a high heat with the bicarbonate of soda for a few minutes before adding the water. Cook for 30-40 minutes or until the chickpeas are tender.

  3. Once cooled enough to handle, pop the chickpeas out of the skins using your thumbs, index and middle finger. It’s therapeutic, trust me.

  4. Add the chickpeas to a food processor with the garlic and salt and pulse until crumb-like. Add the lemon juice and tahini and blitz until smooth. Next, keep the blender running and pour in about 100-120ml of cold water and blend for a few minutes until you have what is pretty much the most delicious hummus around. Leave to rest for 20-30 minutes before serving, otherwise keep refrigerated until needed.

  5. To serve, spread lovingly on a plate, adorn with a drizzle of olive oil, a dusting of sumac and a few toasted pine nuts.

  6. Serve at room temperature.

*Spread the pine nuts on a baking sheet and blast at full temp for 3-5 minutes.

Polpo's Asparagus Risotto + Memories of Venice

In 2010 I spent the summer travelling through Europe with my best friend. The original plan had been to travel along the coast of Spain through to the South of France, dip into Tuscany and head across to Hungary and other Eastern European destinations, before swinging back through Central Europe and returning home. Technically speaking we did follow this route, but we didn’t stick to our times. We stayed in Italy for as long as we possibly could without turning our Euro trip into just a trip to Italy.

We started in Genova, the home of pesto, hidden restaurants and narrow streets – it really is an unknown gem. Our next stop was Pisa where we spent our days living the nomad life and the hot evenings drinking cheap cocktails by the river. Next it was Florence where we found the number of tourists quite shocking and the ice cream irresistible, before we grabbed our backpacks and headed straight for what I consider to be Italy’s capital of food, Bologna. Finally we took a train to what would be our final destination in Italy: Venice.

Venice has a charm different to that of Rome or Naples, it’s rather more enchanting and I suppose a little less in your face. Of course there are days where the small canal-side streets are crawling with tourists, all eager to have spaghetti al vongole in San Marco square, but what makes this floating city special is that you can turn a corner and find yourself away from the hustle and bustle and in another world in a snap. It’s pretty easy to get lost, but that’s part of the fun.

We spent longer than expected in Venice, enjoying a life of somewhat luxury by staying with M’s aunt Julia in her beautiful renaissance apartment (SO Vicky Cristina Barcelona, right?). We spent our time divided between discovering the beauty of Venetian cuisine, free-riding traghettos and whiling the days away on the sandy shores of the lido. Flicking through the pages of my newest cookbook purchase reminded me of that trip, which now seems like so long ago. Better yet, it reminded me about the blog I kept while I was travelling; if you’re interested in seeing some horrendous grammatical errors and some amusing anecdotes you can find all of that here.

Now about this risotto, I can’t tell you enough how wonderfully simple and delicious it is, and after trying the method of adding the wine before the rice I will never go back to doing it the other way around. The fat from the prosciutto melts into the creamy risotto, which is in turn spiked with its saltiness and that of parmesan. Truly delectable.


Asparagus Risotto with Prosciutto

Serves 2

Barely adapted from Polpo, A Venetian Cookbook (of sorts)

Ingredients

50g unsalted butter

2 tablespoons olive oil

1 white onion, finely chopped

100ml dry white wine

150g arborio rice

250g asparagus

700ml-1ltr vegetable stock

Parmesan

4 slices prosciutto crudo


Method

  1. Heat 25g butter and olive oil then add the onion and sauté for 7 minutes or so until soft but not browned. Add the white wine and cook down for a few minutes before adding the rice and chopped asparagus (reserve the spears for addition later). Stir until the rice is well-coated and opaque.
  2. Begin to add the stock, add a ladleful at a time and stir often. Don’t let the rice ever dry out before each addition. After about 15 minutes you should have reached the right consistency, but go by your personal taste.
  3. Add the remaining butter and grate in a handful of parmesan, stir until melted and distributed and season to taste with salt and freshly cracked black pepper and leave to rest for a couple of minutes.
  4. Serve topped with prosciutto and a sprinkling of parmesan.
White Velvet Funfetti Cake

So my birthday happened. It was full of smiles, and tears, and cards and gifts and a mini-meltdown. AND CAKE. This cake.

White Velvet Funfetti Cake | Thyme & Honey

Warning. Once you make this cake you will never go back to whatever it is you used to make. You couldn’t possibly, this cake is really that great. Sure, you could make a deliciously sweet and simple birthday cake that will please all, of course you could. But if you want to wow, push the boat out and say goodbye to that bikini/similar item of clothing for men then this is the cake you need.

It is true that when you have a bit of a rep for making cakes that people don’t like making cakes for you. Over the last couple of years especially I’ve noticed the lack of cake going down when my birthday rolls around. But this year I was taken by surprise. Not one, but two cakes! First, a truly magical mascarpone/ricotta/Nutella cheesecake that was literally hand-delivered (putting me back 5lbs from beach bod 2014), and secondly an oh-so-pretty classic cake from my mum, brought to the table with out of tune singing and a firecracker in the middle. Like a boss.

However, it is also true that when you have a bit of a rep for making cakes that you will insist on making your own birthday cake despite other people making you cakes. Let’s not discuss how sad the reality of making your own birthday cake is, but let’s look at the pictures and discuss the sheer greatness of a white velvet cake, rainbow sprinkles and appropriately Pinterest, ombre Swiss meringue buttercream.


White Velvet Funfetti Cake

For three 6" (2" thick) cake layers

White Velvet Cake – quantities adapted from Rose Levy Berenbaum’s recipe here. I can’t praise Rose’s recipe enough, it is perfect. Egg whites ensure the cake is feather light and fluffy but not dry in the slightest.

Ingredients

For the white velvet cake

4 large egg whites

190ml milk

1.5 teaspoon vanilla bean paste or extract

240g sifted all-purpose flour

240g caster sugar

15g baking powder

½ teaspoon salt

140g unsalted butter, room temperature

80g rainbow sprinkles


Method

  1. Preheat oven to 180°c (160°c fan)
  2. In a bowl lightly whisk the egg whites, 50ml milk and vanilla until just combined. Set aside.
  3. In a stand mixer add the dry ingredients and blitz to combine. Add the softened butter and remaining 140ml milk and mix on low for 30 seconds, then increase the speed to medium and beat for 1 and ½ minutes to ‘aerate and develop the cake’s structure’, as Rose puts it. Scrape down the sides then add the egg mixture in three batches, beating to incorporate the ingredients after each addition. Finally fold into the rainbow sprinkles.
  4. Scrape the batter into the prepared pans and smooth the surface with a spatula if needs be. The pans should be half full. I only have one 6” pan so I bake each layer sequentially despite how inefficient that may be. Assuming you have two cake pans like a normal person, split the batter in half and bake the first two layers followed by the third.
  5. After 25 minutes or when a toothpick inserted near the middle comes out clean they’re done! Leave the cakes to cool for 5-10 minutes in the pan before removing and leaving to cool entirely on wire racks.

For the Swiss Meringue Buttercream

200g caster sugar
10 (400g) large egg whites
600g unsalted butter, cut into cubes

Shimmer pearls to decorate

 
  1. Place the sugar and egg whites in a heatproof bowl above a pan of simmering water and whisk until the sugar has dissolved, around 3 minutes. Test by rubbing the mixture between your fingers – it should be completely smooth.
  2. Transfer to a stand mixer fitted with a whisk attachment and beat on high for 10 minutes until the mixture has completely cooled and formed stiff glossy peaks.
  3. Add the butter one cube at a time, beating until incorporated after each addition. Don’t worry if the icing curdles, it will smooth out as you continue to beat the butter in.
  4. Once all of the butter has been incorporated, switch to the paddle attachment and beat on the lowest speed for 5 minutes to get rid of any air pockets.

To assemble

  1. Add a dollop of frosting between each layer and on top to crumb coat the outside (basically a really thin, rough layer of icing). Put the cake in the fridge to set. While you’re refrigerating the cake, split the remaining icing into three bowls and mix in your chosen dye to create your ombre colours; dark, medium and light. Place each colour of icing in a piping bag and snip off the end, or use a large round nozzle.
  2. Remove the cake from fridge after 30 minutes and pipe the darkest colour around the bottom sides in a line, a couple of times should do it. Pipe the middle colour above the darkest, followed by the lightest colour which you should also pipe on the top.
  3. Use a palette knife to smooth the icing, but try not to mix the colours together too much. You can make the cake look more rustic with some fancy wrist movements and swishes, or in other words, by moving your wrist in an S shape. Decorate with shimmer balls.
  4. Serve at room temperature, ALWAYS room temperature. If you live in a hot climate (you lucky f….), then store in the fridge and bring to room temperature before serving.
Espresso Caramel Ice Cream

I’m just going to say it. Ice cream significantly improves my quality of life (apart from maybe this one time). That’s right. Not everlasting friendships, not love, not financial security. Just ice cream.

Espresso Caramel Ice Cream | Thyme & Honey

Vanilla, chocolate, coffee, caramel, cheesecake, praline, rocky road, cookie dough, strawberry, banana, fudge, chocolate again, coffee always, breakfast, lunch, dinner, weddings, Bar Mitzvahs, birthday parties, pyjama Sundays – these are just some of many flavours and occasions where ice cream makes my life just great.

The same goes for this monstrous tub of joy above, so let’s discuss.

Espresso infused cream is mixed with bubbling caramel then spiked with Daim chocolate and churned to creamy perfection. The resulting ice cream is sweet but not overly so, with just the right amount of bitterness from the coffee and crunchy surprises of that Scandi favourite. The coffee in this means it’s entirely acceptable to eat this for breakfast behind closed doors. I don’t think it really gets better than this.

I can just hear some of you screaming ‘but what about donuts?!’ – coming soon my friends… just you wait.

In other news spring decided to show up, which means this song is getting its annual airtime. Enjoy!

Espresso Caramel Ice Cream | Thyme & Honey

Espresso Caramel Ice Cream

Serves 8

Ingredients

480ml double cream

240ml whole milk

1 vanilla bean, split and seeds removed

200g granulated sugar

60ml water

3 egg yolks

2 tablespoons instant espresso powder, mixed to a paste with splash of water (optional for all y’all haterz out there)

100g Daim bar chocolate, roughly chopped


Method

  1. Mix together the cream, milk, seeds from the vanilla bean and espresso paste and set aside.
  2. In a heavy pan, heat the sugar and water until it caramelises and turns dark amber in colour – around 6 minutes. Remove from the heat and whisk in the cream mixture, then quickly return to a low heat to keep warm.
  3. Whisk the egg yolks for 5 minutes until pale yellow. Temper the eggs by pouring in about 1 cup of the caramel sauce, then whisk the egg mixture back into the caramel and heat on low while stirring until it coats the back of a spoon.
  4. Remove from the heat, strain into a large bowl and leave to cool to room temperature.
  5. Once the mixture has cooled stir in the chopped Daim chocolate and simply add it to your ice cream maker and churn according to manufacturer instructions, then transfer the ice cream to a tub and freeze for at least 3 hours or overnight to firm up.

Keeps for one week.

New York Style Bagels

I’m in New York!

Yes. Right now. I am probably eating a hot dog at this very moment. In fact it’s probably my second today. What? I’m on holiday…

I love New York, even though it isn’t mine, the way something has to be, a tree or a street or a house, something, anyway, that belongs to me because I belong to it.
— Truman Capote

My brother moved out to NYC in September and is now living the stereotypical struggling actor’s life waiting tables and adjusting to shoebox living. He’s my best friend, my biggest supporter and one of few who get my weird jokes, so the move was hard and I’ve found that living in different cities is a bit shit, really. We FaceTime, he shows me around his small room in Chelsea, I tell him about the things that have been going on in my life. We discuss House of Cards and Arrested Development, and quote our favourite line from 21 Jump Street frequently. Gah, I’ve missed him. A visit was well and truly due.

So now I’m here,  wandering right through the very heart of it or however the words go, with a carefully compiled hit list of things to devour and places to visit and comfy shoes on my feet. In tow is my best friend, ultimate travel companion and dinner date, we share a love for donuts and other delectables. First on our list: NYC style bagels. I will of course be sure to let you know how they are, but until then they come just as good if not better when made at home. Toasted, smothered with cream cheese and smoked salmon (or blueberries! Definitely a thing) – this will be how I’ll be self-medicating when the inevitable post-NYC blues hit.


New York Style Bagels

Makes 8 medium-sized bagels

Recipe from The Sophisticated Gourmet

Ingredients

500g bread flour

1.5 teaspoons salt

7g active yeast

1 1/4 cups warm water

1.5 tablespoons caster sugar

Optional toppings: sesame seeds, poppy seeds etc


Method

  1. Add the yeast and sugar to warm water and leave to stand for 5 minutes, then stir until dissolved.
  2. Mix together the salt and flour and make a well in the centre. Pour in the water mixture and bring the dough together with a spoon. Start off with half of the water and use as much as needed. The dough will be shaggy. Tip it out onto a well floured surface and knead for a good 10 minutes until springy and pliable. Place in a lightly oiled bowl, cover and leave to rise somewhere warm for 1 hour.
  3. After it’s risen, punch the air out and leave to rest for a further 10 minutes. Preheat the oven to 220°c.
  4. Cut the dough into 8 equal-sized pieces and roll them each into balls. I pull the sides of the dough down and round to the bottom so the balls are taught. With a well-floured finger press a hole through the middle of each ball and widen slightly, then place on a lightly oiled baking tray. Cover with a clean dishcloth and leave to rest while you bring a large pot of water to boil.
  5. Place half of your bagels in the boiling water and cook for 2 minutes on each side. Remove with a slotted spoon and continue with the rest of the batch. Place the now boiled bagels on a baking sheet and bake for 20 minutes and until golden. If you want a slightly crunchier top to your bagels (like me) then bake in the upper third, if not then stick to the lower third of your oven.
  6. If you are adding toppings to your bagels, brush them with egg wash and sprinkle with your toppings after boiling and before baking. 
  7. Leave to cool if you can wait. Best toasted and smothered with cream cheese.
Brown Butter Banana Bread

I’ve been told the three most stressful things in life are death, divorce and buying a house.

Brown Butter Banana Bread | Thyme & Honey

I’ve sadly experienced death, luckily never divorce and for the first time ever I am finding out what it’s like to buy and build a home. I’m basically at the mercy of arrogant estate agents who haven’t got the time of day in a seller’s market, in a city where buying a house is like some kind of competitive sport. Like a 200m sprint for a period conversion close to a tube station. And what’s with all the phone calls? Have any of these property negotiators heard of email? SIGH.

It is a stress that prior to a few weeks ago I never knew, which is why I’m now feeling very stupid having scoffed when my dad warned me about the absolute ball ache that buying a house is. Why can’t buying a house just be easy, a good old fashioned spit and shake on the sale? WHY?

Anyway, thanks to the aforementioned stress I’ve been under, I’ve been keeping it simple in the kitchen recently. Baking is therapeutic, and banana bread is the epitome of simple. Plus it gives me a great excuse to ignore calls from estate agents.

Enjoy!

Brown Butter Banana Bread | Thyme & Honey

Brown Butter Banana Bread

Makes one 9x5" loaf

Ingredients

175g unsalted butter

240g all-purpose flour

1 teaspoon bicarbonate of soda

1/2 teaspoon salt

2 large eggs

60ml buttermilk

1 teaspoon vanilla bean extract

350g ripe banana, roughly mashed with a fork

175g dark brown soft sugar


Method

  1. Preheat oven to 180°c (160°c FAN) and prepare a loaf tin with parchment paper
  2. First brown the butter. On a medium heat melt the butter, whirling the pan occasionally. It’ll crackle and pop for a while, then it will stop. Give it a few swirls then pour it into a bowl to stop it from burning and to allow it to cool slightly.
  3. Whisk together the flour, salt and baking powder in one bowl, then in another whisk together the eggs, vanilla and buttermilk.
  4. Add the sugar and whisk well, then add the banana and finally the brown butter. Next add the dry ingredients to the wet ingredients and whisk roughly.
  5. Pour into your loaf tin and bake for 1 hour or until a toothpick comes out clean. Cut into mega thick slices and serve with butter. Lots and lots of butter.
Roasted Blood Orange Oatmeal

Let this be the saddest hey y’all of the year.

I’ve been having a bit of an off week with my mind all over the place and my financial situation pretty dire, a given towards the end of January. Let’s face it, January is the worst month of the year, December’s ugly sister, 31 days of sadness. This song is and isn’t helping.

Roasted Blood Orange Oatmeal | Thyme & Honey

Whenever I start feeling like this, you know, questioning the meaning of life and my existence, I try and counteract the feelings of borderline self-loathing with things that will perk me right up, from the inside out. I’ve started running again, I’m not really drinking, I’ve quit smoking (hurrah!) and I’m eating clean. Well… kind of.

When I’m on a health kick I look at incorporating seasonal ingredients into my diet more so than usual, after all seasonal produce is not only fresher and tastier (strawberries, I rest my case), but it’s like, totally zen reconnecting with natural food cycles.

Blood oranges are right in season at the moment, and they are disguising themselves as oranges all about town. I realised that I hadn’t had a blood orange for a while, probably since it was last in season, and so the below was born. The almond milk makes these oats creamy and slightly sweet, and the roasted blood oranges add a fresh and tangy punch. This breakfast is my happy place right now.

Roasted Blood Orange Oatmeal | Thyme & Honey

Roasted Blood Orange Oatmeal

Serves 2

Ingredients

200g coarse oatmeal

750ml water

Pinch of salt

250ml almond milk

4 blood oranges

Coconut oil

1 tablespoon soft brown sugar

Unsalted pistachios

Pumpkin seeds


Method

Preheat the oven to 200°c (180°c FAN)

  1. Halve the blood oranges and remove the peel. Place on a baking tray and drizzle with a little coconut oil and a sprinkle of sugar. Roast for around 10-15 minutes.
  2. Meanwhile make the oatmeal. Add water and a pinch of salt to a pan and bring to the boil. Add the oats and stir, then bring up to the boil again. Reduce the heat to low and add the almond milk. Simmer the oatmeal stirring occasionally for 15-20 minutes.
  3. Divide the oatmeal between two bowls, top with extra almond milk, the roasted blood oranges, chopped pistachios and pumpkin seeds.
Cinnamon Pull-Apart Buns

Hi! So it’s Tuesday and we should talk about cinnamon buns. 

If I were to rate my attempt at sticking to my New Year’s resolutions on a scale of 1 to 10, 10 being absolutely feeble, then I’d most definitely be sitting at 9.5. These cinnamon buns have been my undoing. Has it been worth it?

Trick question. As far as sweet pastries go I’ve always been a Danish/Cinnamon Swirl kinda gal. I mean, what is not to love? If you were even going to try and answer that then just go, go right now and don’t come back. Because what you’re about to see should probably be illegal.

I’m going to go ahead and pad this post out with a string of adjectives. Scroll down for the good stuff.

Beautiful, blissful, freshly baked and fresh out of the oven, a pleasurable fit for the gods. Fluffy on the inside, sticky, sweet, scrumptious and if we’re serious, sinful. Swirled, glazed, homemade and indulgent. Ladies and gentlemen I give you, Cinnamon Pull-Apart Buns.

Cinnamon Pull-Apart Buns

Makes 10-12 buns

Adapted from Joy the Baker and Pinch of Yum

Ingredients

For the dough:

Half a sachet (3.5g) active dry yeast

60ml warm water

120ml whole milk, scalded

100g caster sugar

1/2 teaspoon salt

480g all-purpose flour

2 eggs, beaten

60g unsalted butter, melted

75g sultanas

For the filling:

30g unsalted butter, room temperature

1 heaped tablespoon ground cinnamon

135g brown sugar

For the sticky glaze:

1 egg, beaten (to brush)

6 tablespoons icing sugar

3 tablespoons whole milk


Method

  1. Add the yeast to warm water and stir to dissolve. Leave for a few minutes until it begins to froth, then transfer it to the bowl of a stand mixer fitted with a dough hook attachment. Add 120g of the flour, sugar, salt, beaten eggs and the hot milk and mix on a low speed for a few minutes until the dough has come together, then add another 180g of flour and turn the speed up a bit until it’s been incorporated. Finally add the melted butter and the remaining 180g flour and knead the dough for around 5 minutes. The dough will be super sticky and elastic, but panic not! Scrape (literally) the dough into a lightly greased bowl, cover with clingfilm and leave to rise in a warm spot for an hour.
  2. After an hour of proving, tip the dough out onto a lightly floured surface and with your hands, knead in the sultanas. Work the dough for 5 minutes or so until it is springy and pliable, and doesn’t stick to the work surface. Shape the dough into a ball, place back in the bowl, cover and leave to rise for another 30 minutes.
  3. After the second prove, take the dough and roll out onto a lightly floured surface. Roll it into a rectangle around half an inch thick and transfer to a sheet of parchment paper. Spread the softened butter over the entire surface of the dough. Mix together the sugar and cinnamon then sprinkle it gently dump it all over that beast of glory and spread evenly. NOTE: the amount of sugar in this recipe results in oozing, sticky, delicious cinnamon buns. If you’re not into that, then please click the top right button… or left if you’re on a Mac.
  4. Roll the dough away from you into a log and sit seam-side down. Cover with a clean dish towel and leave to rise for another 20 minutes – I know, the suspense is killing me too. Preheat the oven to 200°c to pass the time.
  5. FINALLY – it’s time. Slice the dough-log-thing almost all of the way to the bottom, leaving about an inch between each slice. You should get between 10 to 12 slices. Then arrange each cut section so that they lean to alternate sides. Brush the dough all over with the beaten egg. Slide the parchment paper with the cinnamon buns onto a baking sheet.
  6. Bake in the middle of the oven for 20-25 minutes until puffed up and golden and oozing and until the house smells so damn good you literally can’t handle life any more. I’m so sorry for sharing this with you.
  7. Sticky glaze:
  8. Whisk together the icing sugar and milk and drizzle all over the cinnamon buns. For a thicker glaze use more icing sugar.
  9. Pull-apart and die happy.
Salted Butter Caramels

So it’s getting to that time of year… the BEST time of year. Fine, I won’t start wearing my Christmas jumpers and cheer until the 1st December, but I will start prepping for Christmas lunch (yes, really) and thinking about gifts. Haters gonna hate.

Salted Butter Caramels | Thyme & Honey

A few years ago I made homemade gifts for some of my friends, partly because I was totally broke yet didn’t want to come across as a total Scrooge. This was back when salted caramel was having a ‘thing’ and everywhere I looked there was salted caramel this and salted caramel that. It seemed like a sign, so off I went and picked up a cheap candy thermometer to get the party started. The resulting caramels were deeelicious, and received as thoughtful and “so cute”. Winning.

Finding myself in a similar predicament to that cold and penniless Christmas, I’m getting my Martha Stewart on once again and am planning an array of homemade treats to gift to friends. I’m thinking jams, nut butters, cookies – the works. And these devilishly buttery salted caramels are definitely making a comeback.

Although these sticky sweet mouthfuls of joy may seem intimidating, it’s more about patience and keeping a watchful eye on the temperature than actual skill. Heat two pans of cardiac arrest, mix them together and heat again – voilà.


SALTED BUTTER CARAMELS

Makes 60 caramels

Ingredients

150g soft light brown sugar

125g golden syrup

100g unsalted butter, cut into cubes

250ml thick double cream

150g caster sugar

1 teaspoon vanilla bean paste

Smoked sea salt flakes


Method

You’ll need: a candy thermometer, parchment paper to wrap the candies in, or if you’re a fancy so and so, candy wrappers.

  1. Firstly prepare a tin for your caramel to set in by greasing with sunflower oil and lining with parchment paper.
  2. In a pan add the brown sugar, golden syrup, butter and cream and place over a low to medium heat. Heat the mixture until smooth and hot, stirring occasionally. Remove the pan from the heat and set aside.
  3. In a heavy duty pan add the caster sugar and 2 tablespoons of water, and start to dissolve over a low heat. Once dissolved you can bring the heat up a little and keep melting the sugar syrup until it caramelises and turns amber in colour. NOTE: You don’t want to stir the syrup unless there are specific spots where the sugar isn’t melting, rather whirl the pan.
  4. Once the sugar syrup has caramelised, remove the pan from the heat and pour in the butter and cream mixture, while exercising caution – this stuff is H O T.
  5. Put the pan back on the heat and pop your candy thermometer in. Bring the mixture up to 250°f and then immediately remove from the heat. Stir in about 1/2 teaspoon of smoked salt and a teaspoon of vanilla bean paste, then pour into your prepared tin and sprinkle the top with extra smoked salt.
  6. Leave (out of the fridge) for at least 5 hours or overnight before cutting into small squares and wrapping individually. These will keep for a good 2 weeks stored in an air-tight container.

First time? The first time I made caramels I followed David Lebovitz’ recipe, which provides detailed advice and guidance for anyone making caramels for the first time. He instructs to heat the caramel until 260°f, basically resulting in a slightly firmer candy. The above recipe makes beautiful, melt in your mouth, soft candies.